Creating and texturing a bridge with Blender
by R. Niehoff
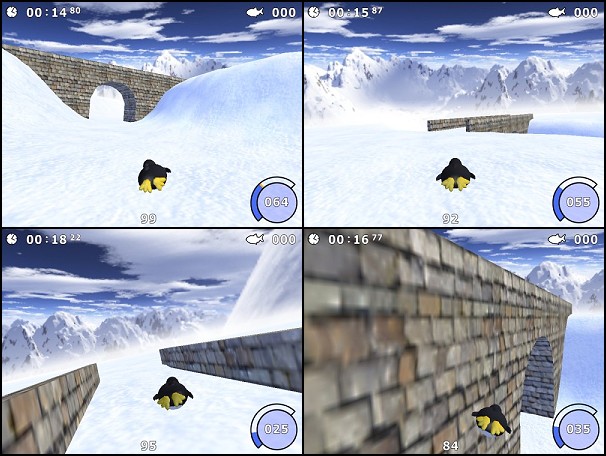
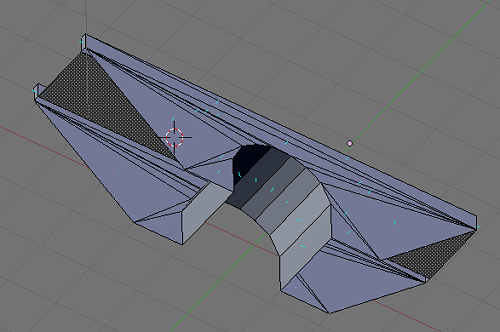
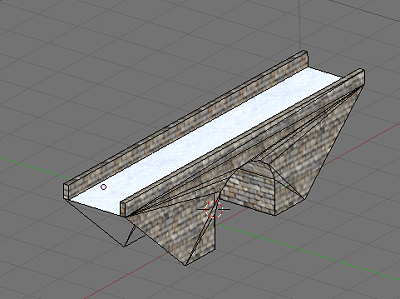
In my opinion, the bridge is one of the most important models for Tuxracer because it allows to cross-over the track. That makes a course much more flexible.
Step 1: Shaping the model
Start with an empty mesh in the front view and place a set of vertices. To get an exact shape snap the vertices to grid (SHIFT S).
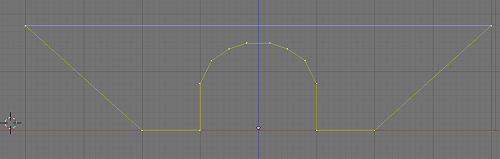
Then extrude this structure exactly in z direction (E Z).
After that add some vertices, move and extrude them to get the balustrades.
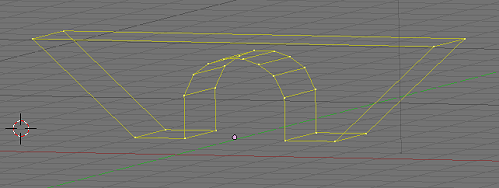
Now fill in the faces, but only the needed. Some faces are never visible on the course. It's extremely important that all (!) face normals point outside. Make this normals visible (panel: mesh tools) and walk round the model to check each face. Flip a normal if it points inside, or better: in the mesh menu there is an option to correct all normals.

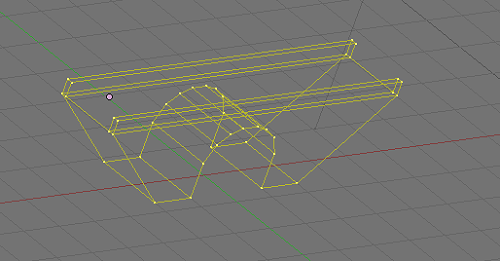
Optical illusion? The next pic shows the bridge from the bottom!
Step 2: Creating the texture map
First split the screen and set the right part to UV Image Editor. For UV mapping you need to be in edit mode.
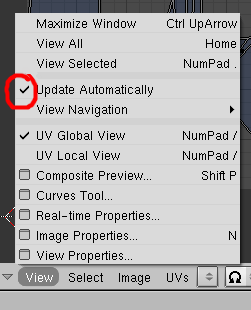
It's a good idea to synchronize the two screens. An additional help is to activate the option "Update Automatically".

Now select all and unwrap the model by typing U (for the UV calculation), then you get a list with several options. You can try all but in my opinion the last (smart projection) is the best for this purpose. On the UV screen you can see the unwrapped faces. Now, when you select a single face on the 3D screen this face is marked on the UV screen, too. So it's easy to arrange the faces in the right order.

To see how the adjacent faces have to be dragged together switch to the vertex mode and click on the vertices (on UV screen). Some faces must be rotated.


At last arrange the groups and scale the arrangement so that all faces are in the area of the UV map.
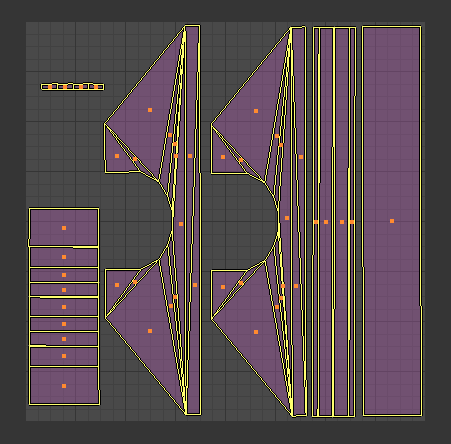
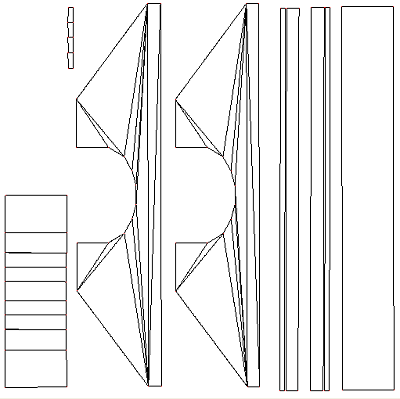
Now it's time to cogitate a bit. What have you achieved at this point? Blender has stored the texture coordinates of all faces. Whenever you have moved, scaled or rotated a face on the UV screen Blender has updated the coordinates. The UV map on the UV screen correlates with the texture image. Since all faces are within the image area the texture coordinates are between 0 and 1. Now you can use the map as a mask for the texture image. Therefore export the map with a script to a .tga file (512 x 512 is a good size). In the UVs menu you find the script for this job.
Don't forget to save the complete work as Blender file. You'll need it later though the next step will be without Blender.
Step 3: Creating the texture image
Open the tga file with any graphic program, the best is a program that allows to use layers (Photoshop or Gimp). I prefer Photo Impact, but ... Additionally open the needed textures. I've used a stonewall texture for the bridge.
Now you can cover the different parts of the image with textures. Transparency of the layers or the movable selections will help.

Finally merge all together and save the image as .png file. That's the file you will use as model texture in Tuxracer.
Step 4: Testing the texture
For the test open the model in Blender again, switch to edit mode and select all on the UV screen. Then open the just edited .png file (image menu). To see the texture on the 3D screen set the draw type to "Textured".
Check each face if it's correctly textured.

All ok? Then it's time to export the model to an .obj file. Give the output the name "testmodel.obj". You will see the following dialog:
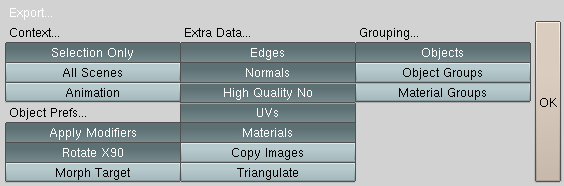
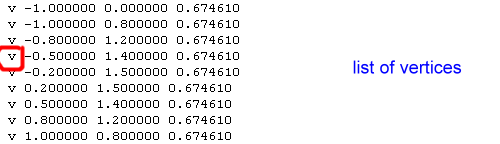
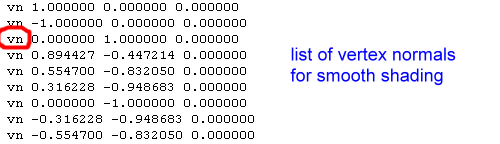
Rotate X90 is necessary since Blender uses another coordinate system than OpenGL. This option changes the y and z coordinates. The high quality normals (vertex normals) are not needed for this model but the converter (see below) needs a complete set of data. Finally open the .obj file and check if it contains the following sections:


Step 5: Using the bridge in Bunny Hill
First you have to convert the testmodel.obj to testmodel.lst. The latter ist the format that can be read by Bunny Hill. Copy or move the .obj file into the folder /data/develop/objects. Then start Bunny Hill with ./bh 81, that will run the built-in tool and do the conversion. BTW: If you want to convert a model that should be smoothly shaded, start Bunny Hill with ./bh 80. Afterwards copy or move the file testmodel.lst into the folder /data/objects and rename it to bridge.lst. Don't forget to copy the texture image bridge.png into the same folder.
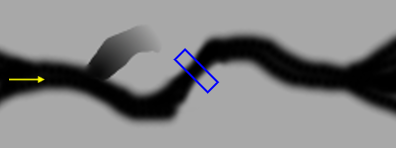
Append now the new model to object_types.lst (see the other entries). Finally use the bridge by appending it to the items.lst of the current course (I use the test course). I suggest to shape a suitable elevation on the testcourse. The structure on the pic is typical for a crossover, you can pass the bridge and you can move under the bridge.
It's not easy to adjust position, scale and rotation of the bridge, but that's not a subject for this article. Run the race and check the appearance of the bridge and - above all - the collision with its faces and edges.